Import data into Rival Learn
- From the Student Portal from the navigation bar, click Administration. Click Importer. Or From the Administration Portal, click Enterprise>Configuration>HR Imports. Click Importer. Click Launch Importer. The Importer page opens.
- Click
 . The Importer Upload page opens: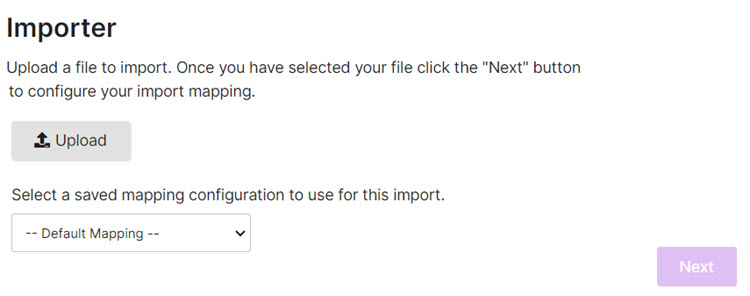
- Click Upload.
- On the File Upload pop-up, select a file and click Open. Do one of the following:
- If this is the first import or you do not have a saved mapping configuration, leave the Default Mapping option selected.
- If you want to reuse a saved mapping configuration for this import, select it from the drop-down.
- Click Next. The Configure Import Mapping page opens:
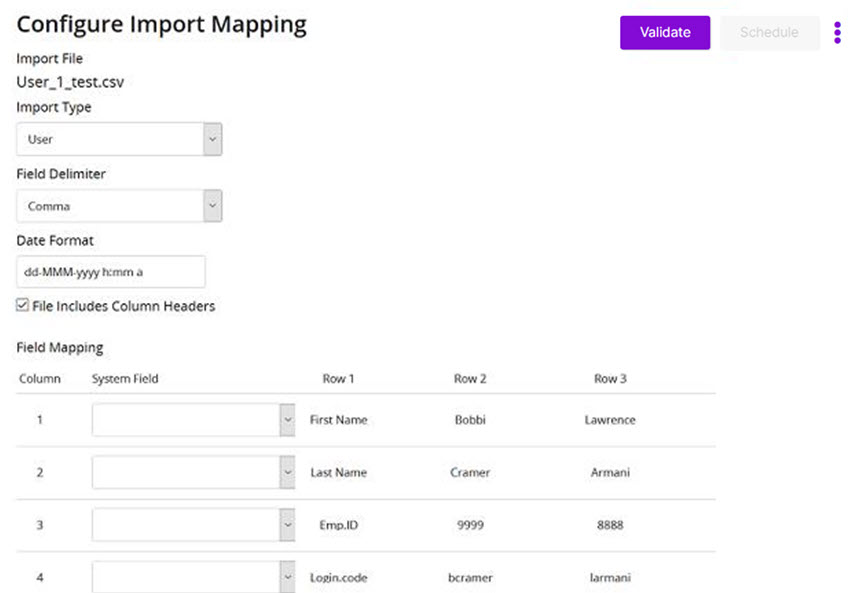
- From the Import Type drop-down, select an import type:
- User
- Training Activity
- eCourse
- Exam
- Assignment
- Competency
- Requirement
Tip: The type you choose controls the system fields you can map to.
- From the Field Delimiter drop-down, select the delimiter for the file.
- If the import file contains column headings, leave the File Includes Column Headers check box selected. Otherwise, uncheck it.
- Map the fields in the file to system fields. (If you want the system to ignore a field, select Ignore Column.)
Tip: If this is a common import, save the import mapping for future use. Click
 and click Save. Give it a name and click Save.
 - Click Validate. If there are problems with field mappings, a warning icon appears in those fields. Correct them and re-click Validate. After a file is validated, you can click Preview to see what it will look like.
- If you are satisfied the file is ready to import, click Schedule.