From the Career Site List page, click beside a career site.
From the Career Site Settings page, click Application Form. The Manage Application Form page opens.
In the Application Form panel, click the Use the configured application form below (If no application form is configured, Quick Apply will be used) option.
In the Configured Application Forms panel, click . The Configure Application Form page opens.
Select a language, name the form, and enter a description (description is internal only).
(Optional) Enter a page title.
Click to add fields to the page. The Configure Field page opens.
From the Field list, select a field. The selectable fields come from Rival Recruit ePostings. You can also add Rich Text elements, evaluation questions, fields for attachments, Resume/CV upload, and so on.
Keep the label the same or enter a new field label. This is the label applicants see on the application form.
(If applicable) Make the field required.
Click Add Field.
Repeat step 7 for each field you want to add.
(If applicable) Click Add Page to add a page to the application form.
Hover on to access icons to perform actions like moving, editing, or deleting the field.
When finished configuring the application form, click Save. The application form appears on the Configure Application Forms page as draft. A draft form is not available to applicants.
When you are ready for it to be available to applicants, click to publish.
 beside a career site.
 . The Configure Application Form page opens.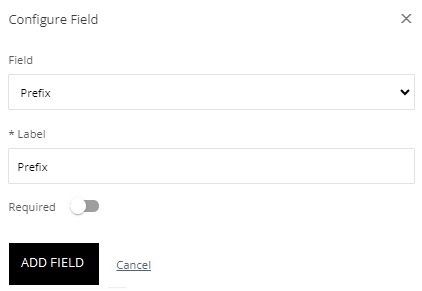
 to access icons to perform actions like moving, editing, or deleting the field.
 to publish.