Configure and publish an open submission form
Note: This option is not available for internal career sites.
- From the Career Site List page, click
 beside a career site.
 - From the Career Site Settings page, click Open Submission. The Manage Open Submission Form page opens.
- In the Application Form panel, click the Use the configured open submission form below (If no open submission form is configured, Quick Apply will be used) option.
- In the Configured Open Submission Forms panel, click
 . The Configure Open Submission Form page opens.
 - Select a language, name the form, and enter a description (description is internal only).
- (Optional) Enter a page title.
- Click to add fields to the page. The Configure Field page opens.
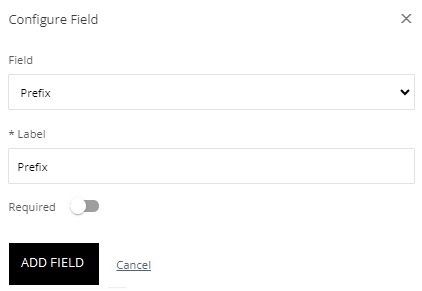
- From the Field list, select a field. The selectable fields come from Rival Recruit ePostings. You can also add Rich Text elements, fields for attachments, Resume/CV upload, and so on.
- Keep the label the same or enter a new field label. This is the label applicants see on the application form.
- (If applicable) Make the field required.
- Click Add Field.
- Repeat step 7 for each field you want to add.
- (If applicable) Click Add Page to add a page to the form.
- Hover on
 to access icons to perform actions like moving, editing, or deleting the field.
 - When finished configuring the application form, click Save. The application form appears on the Configure Open Submission Forms page as draft. A draft form is not available to applicants.
- When you are ready for it to be available to applicants, click
 to publish.