Integrating Rival Recruit with Rival Search
The Rival Search-Rival Recruit integration enables the export of any profile found in Rival Search to the selected job in Rival Recruit and synchronizes candidate data between the two. With this, the sourcing and recruiting workflow is streamlined, minimizing the need to switch between the two applications.
To enable the Search-Recruiting integration, you must have access to the Settings page in Rival Recruit and be a company admin in Entelo Search.
There are two steps to enable the integration:
- Generate credentials in Rival Recruit
- Copy and paste credentials into Entelo Search
Step 1: Generate credentials in Rival Recruit
- Log in to Rival Recruit.
- From the navigation bar, click Administration>Settings. The Settings page opens.
- Under the Integration section, click the Entelo Integration link. The Entelo Integration page opens:
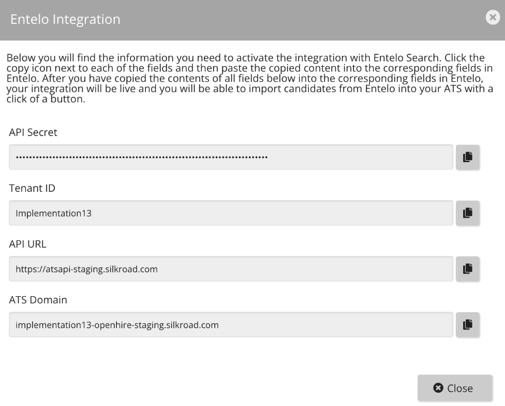 This page contains the information you need to activate the integration with Entelo Search. You will copy each field and paste into the corresponding fields in Entelo Search.
Tip: Do not close this page yet. You will need this information for Step 2: Copy and paste credentials into Entelo Search.
Step 2: Copy and paste credentials into Entelo Search
- Open a new browser window.
- Log in to Entelo Search as the company admin.
- From the user menu, select Organization Management and then click the Integrations option:
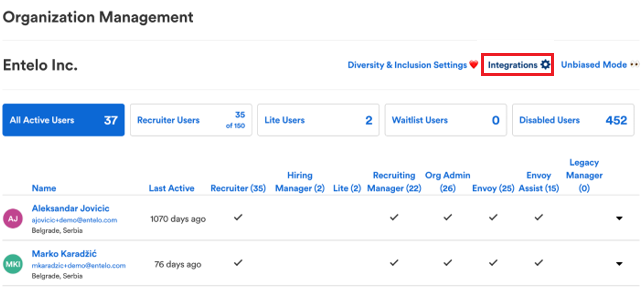
- From the list of available integrations, click Rival Recruit: The Manage integration: Rival Recruit page opens:
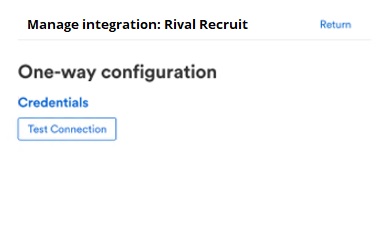
- Click Credentials. The Configure Rival Recruit Integration page opens:
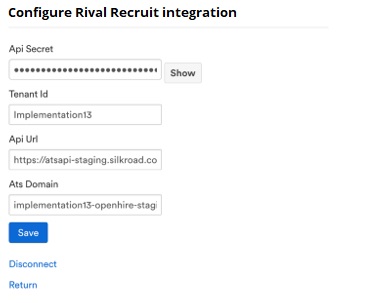
- Copy and paste the contents of each of the fields from Rival Recruit to the corresponding field in Entelo Search.
- Click Save.
- Click Return. The Manage integration Rival Recruit page opens:
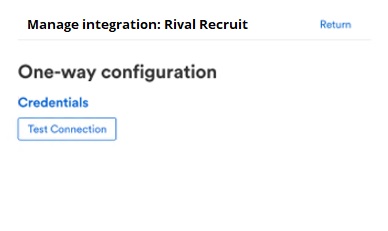
- Click Test Connection.
If the Rival Recruit integration test successful message appears, the integration is successfully configured and enabled. You can now start exporting profiles from Entelo Search to Rival Recruit.
Update credentials or disconnect the integration
You can update credentials or disconnect the Entelo Search-Rival Recruit integration if needed.
- From the Manage Integration page, click Credentials: The Configure Rival Recruit Integration page opens:
From here, you can change the credentials or click Disconnect to stop the integration.
Synchronize data between Rival Search and Rival Recruit
Export of the profiles is the basic functionality of the integration. In addition to that, your integration can be enabled to synchronize the data between Entelo Search and Rival Recruit. This is called two-way synchronization.
To enable two-way synchronization:
- From the ATS Integrations page, click Rival Recruit: The Manage integration Rival Recruit page opens and you will notice two sections:
- One-way configuration (should be enabled already)
- Two-way configuration (enable this to start data synchronization)
- Under Two Way Sync, click Initiate. An Enabled alert appears to let you know the configuration is enabled:
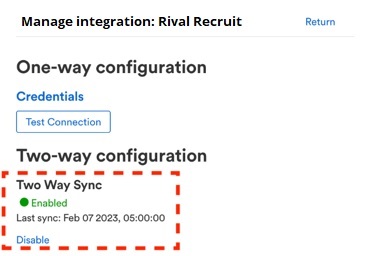 Data synchronization starts immediately. Initial sync may take a while to complete depending on the volume of data involved in the process. After that, data is pooled periodically every 15 minutes.
Tip: You can always click Disable to stop data synchronization.