Integrating Smashfly with Rival Search
To integrate your Smashfly account with Rival Search you will need:
- The Login information for your Admin Rival Search Account
- The Login information for your Admin Smashfly Account
Step 1
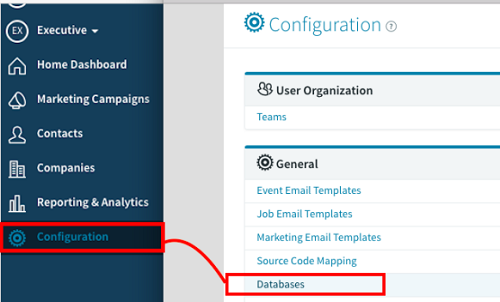
Once you’ve logged into your Smashfly account, click on the Configuration option from the left menu. Then, under the General menu, click Databases.
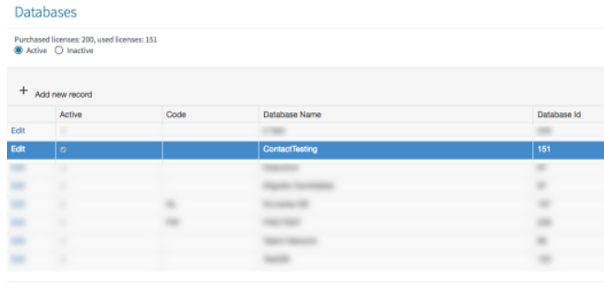
You will see a list of Database(s) your organization uses. Identify the Database you’d like to use and note down its Database Id as you will need it for the following steps.
Step 2
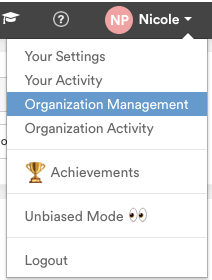
Next, login to your Rival Search account. Clicking on your name in the top right corner will give you a dropdown menu. Select Organization Management from the menu.
Once you have clicked on Organization Management, you will see the following option under the Integrations tab:
Click on Add Smashfly.
Step 3
You will now be directed to the following screen:
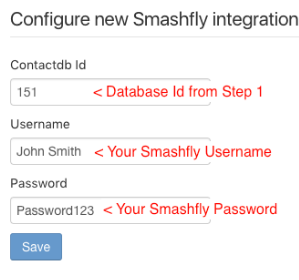
For Contactdb ID: Enter the Database ID you noted down from Step 1.
For Username: Enter your Smashfly Username
For Password: Enter your Smashfly Password
Then click Save. You should see the following notification in the top right-hand corner:

Step 4
Clicking Save will direct you to the following screen for Custom Integration Settings.
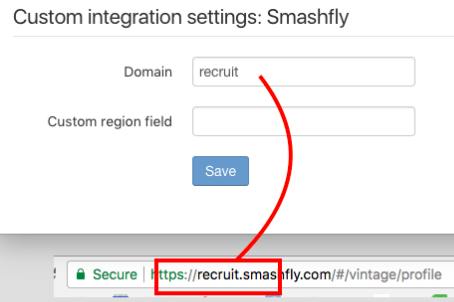
For the Domain field, enter the domain (which is currently defaulted to ‘recruit’). It should match the part of the URL before ‘smashfly.com’ on your organization’s Smashfly site.
You will also see a Custom region field. You can leave this blank, if needed.
Step 5
Once you complete the Smashfly integration with your Rival Search account, you can begin to use it immediately and export candidates seamlessly from Entelo Lists, Rival Search, and/or Profile into Smashfly.
Through the Chrome Extension, or within Rival Search itself, you will see the option to Export to Smashfly:
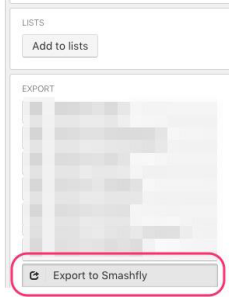
Once you have exported a candidate’s profile into Smashfly, you will see:

Currently, Entelo’s integration with Smashfly doesn’t support the ability to export candidate profiles to specific jobs, and are exported as ‘General Export.’
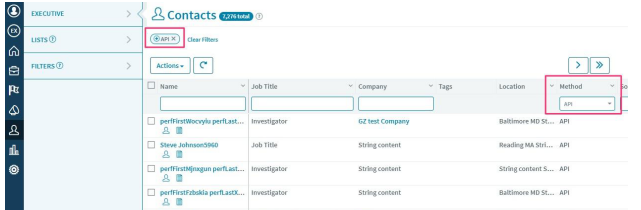
Within Smashfly, you will see exported profiles under Contacts, within the Database you specified in step 1. To view the profiles, you’ve exported from Rival Search, filter your contact list by Method > API:
That’s it! You have now successfully integrated your Smashfly account with Rival Search!