Creating an On-Demand Template (for Digital Interviewing)
In this section, you will begin adding new questions to your On-Demand Templates, which can be created from either the Home page or the Library page.
Step 1:
Navigate to: Home > Create Template or Navigate to: Library > Create Template
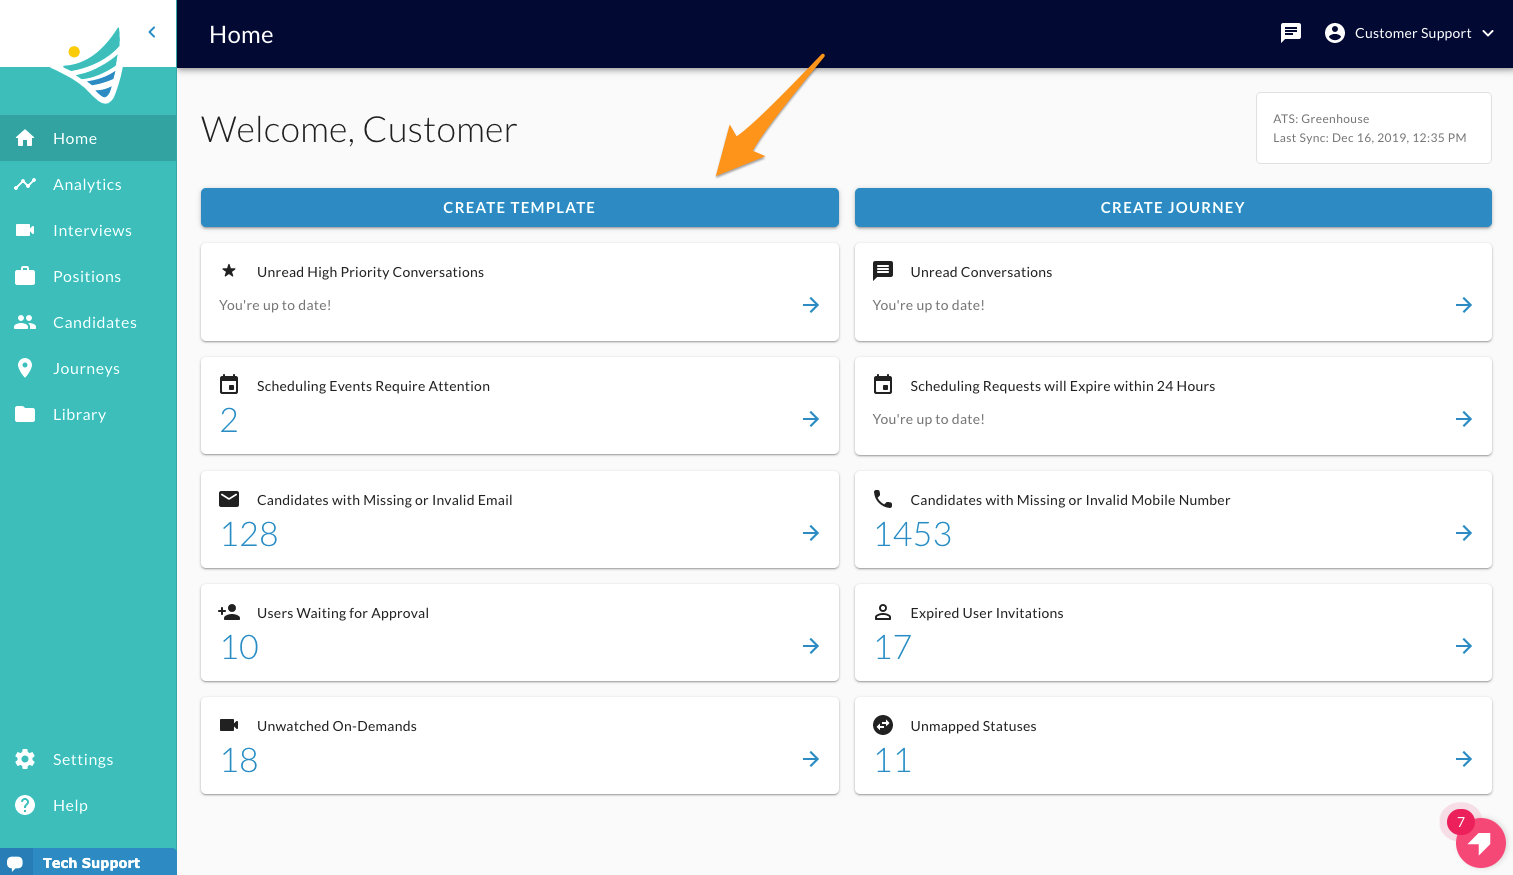
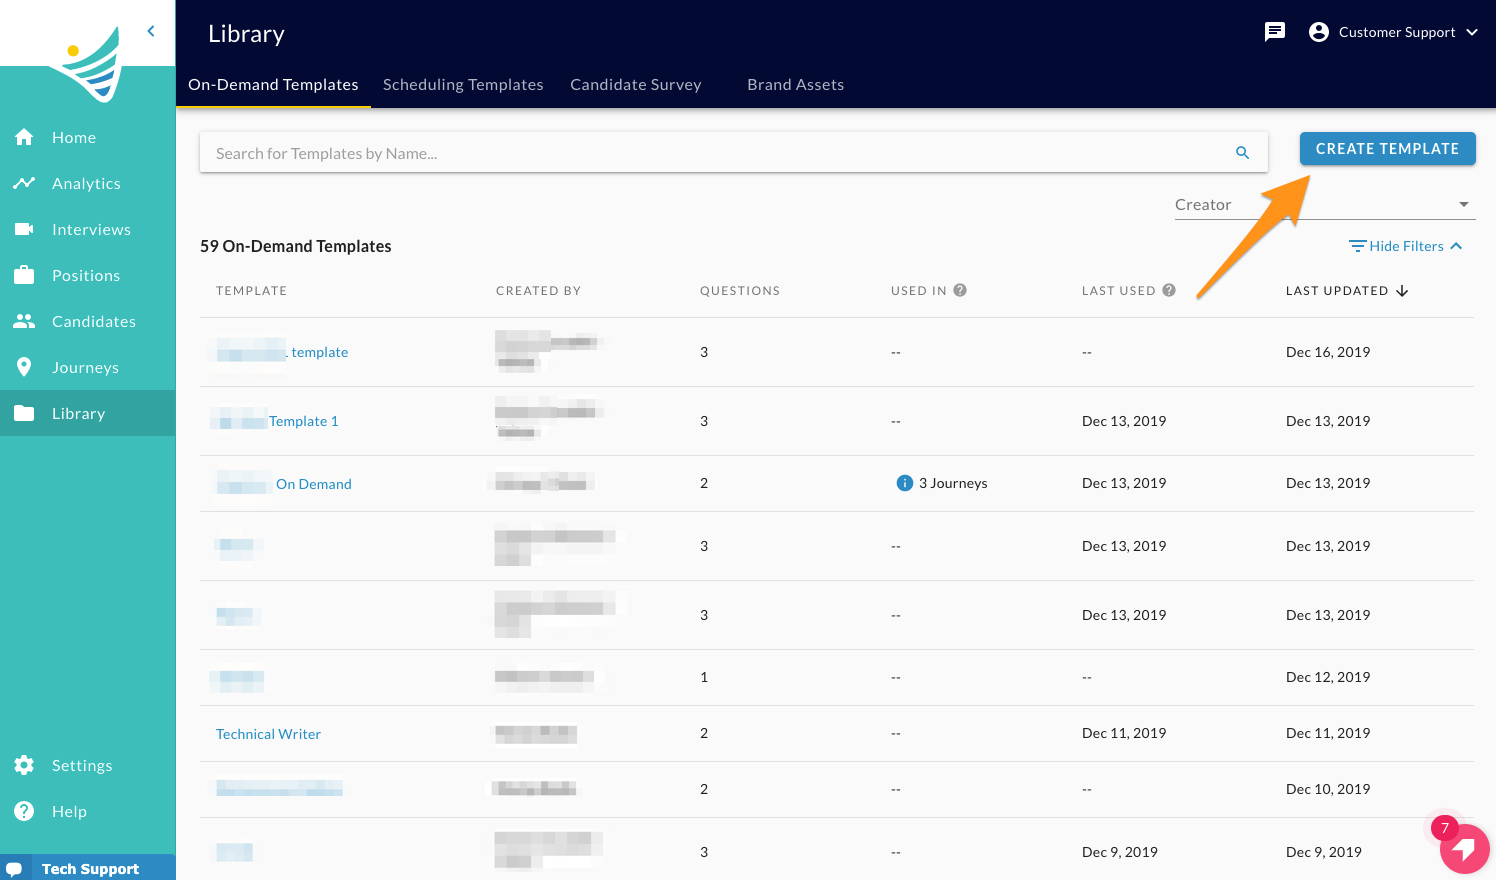
Step 2:
You can begin by creating a title for your template

Step 3:
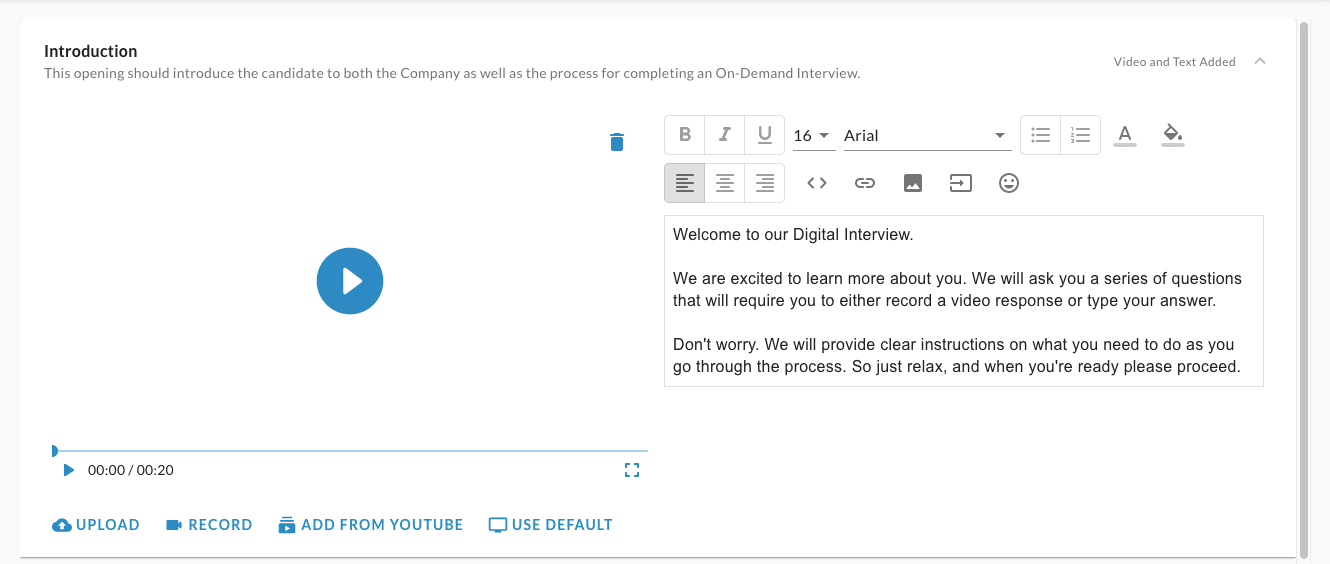
Click on "Introduction" to see your options for creating an introduction to the digital interview. Here you can upload a video introduction, record a video introduction directly from your computer, add a video from YouTube, or use our default video and text. We recommend using both a personalized video and an introduction text.
Use the content editor to enter the content of the intro text and then format it. Merge fields are also available for you to pull in candidate and position data (see list below). Options to insert links, images, buttons, and emojis are available here as well.
Step 4:
Click on "Resume Upload" where you can decide whether you want your candidates to upload a resume or not. The setting also allows to make the resume step optional or required, allowing the candidate to skip it or enforce a document upload. More about this step you can find in a related article: How to Setup Resume Upload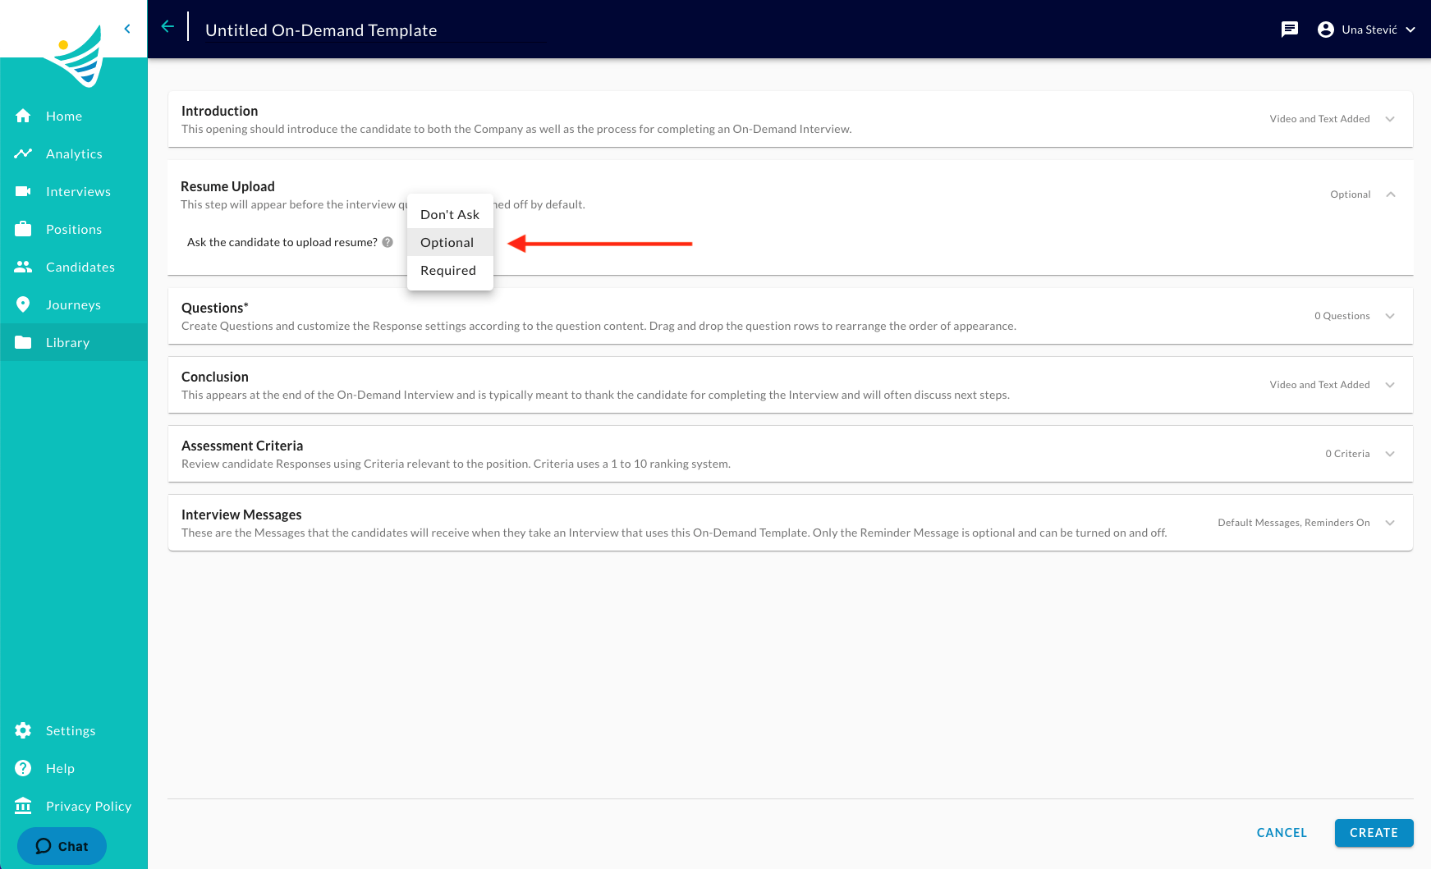
Step 5:
Click on "Questions" to see your options for creating questions in the digital interview. Here you can create a text question, upload a question in the format of a video or record a question directly from your computer.

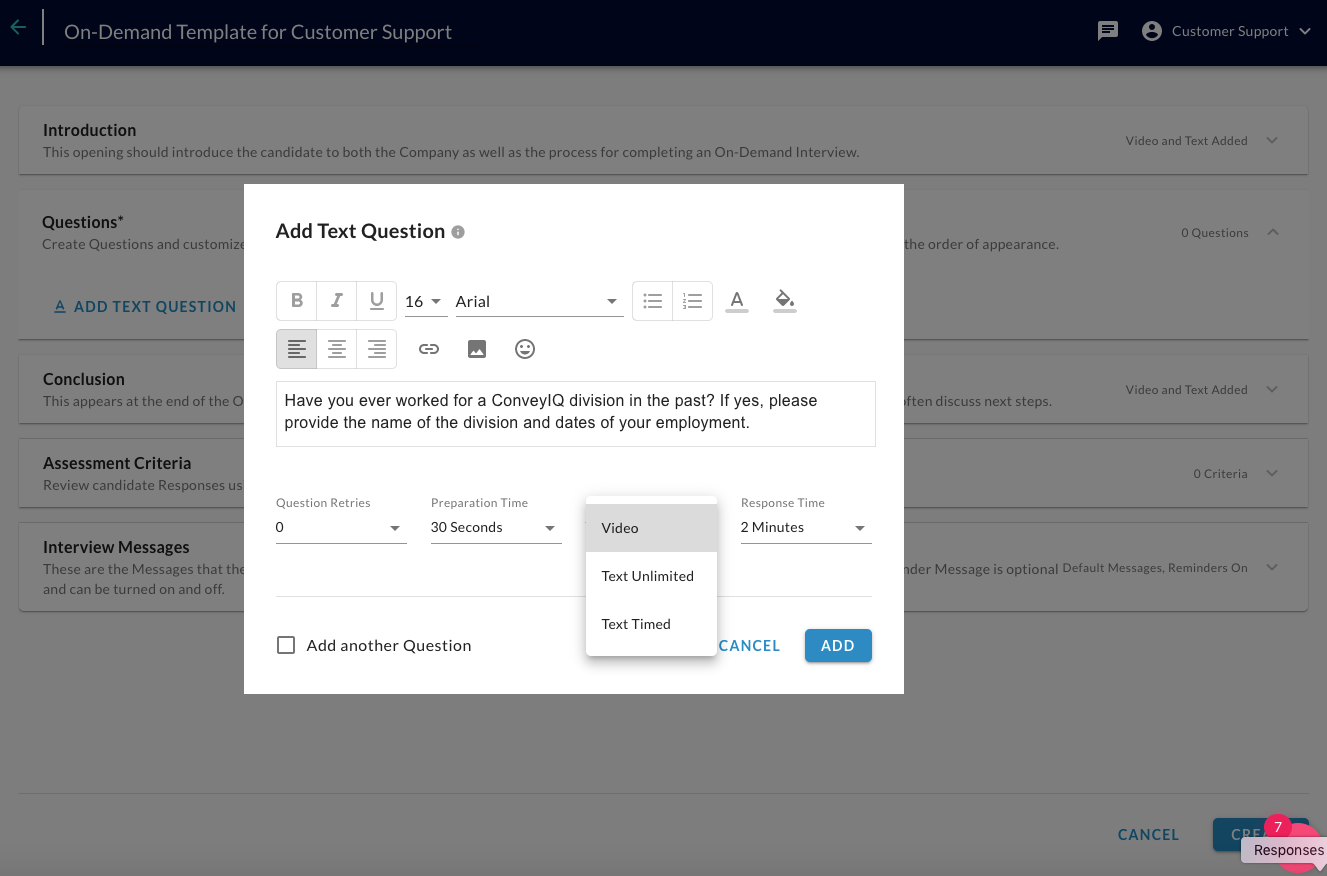
Within the question, you have the ability to include links, images, and emojis. After creating your question, you have the ability to set a number of retries, preparation time, type of response (Video, Text Unlimited, Text Timed) and set a response time limit.
- Retries: The number of retries a candidate would have after providing a response.
- Prep Time: The amount of time the candidate has before they have to start providing an answer.
- Type of Response: Choose video if they need to provide a recorded video response via webcam or choose text if they need to provide a typed response.
- Response Time Limit: The maximum amount of time the candidate has to answer the question.
Step 6:
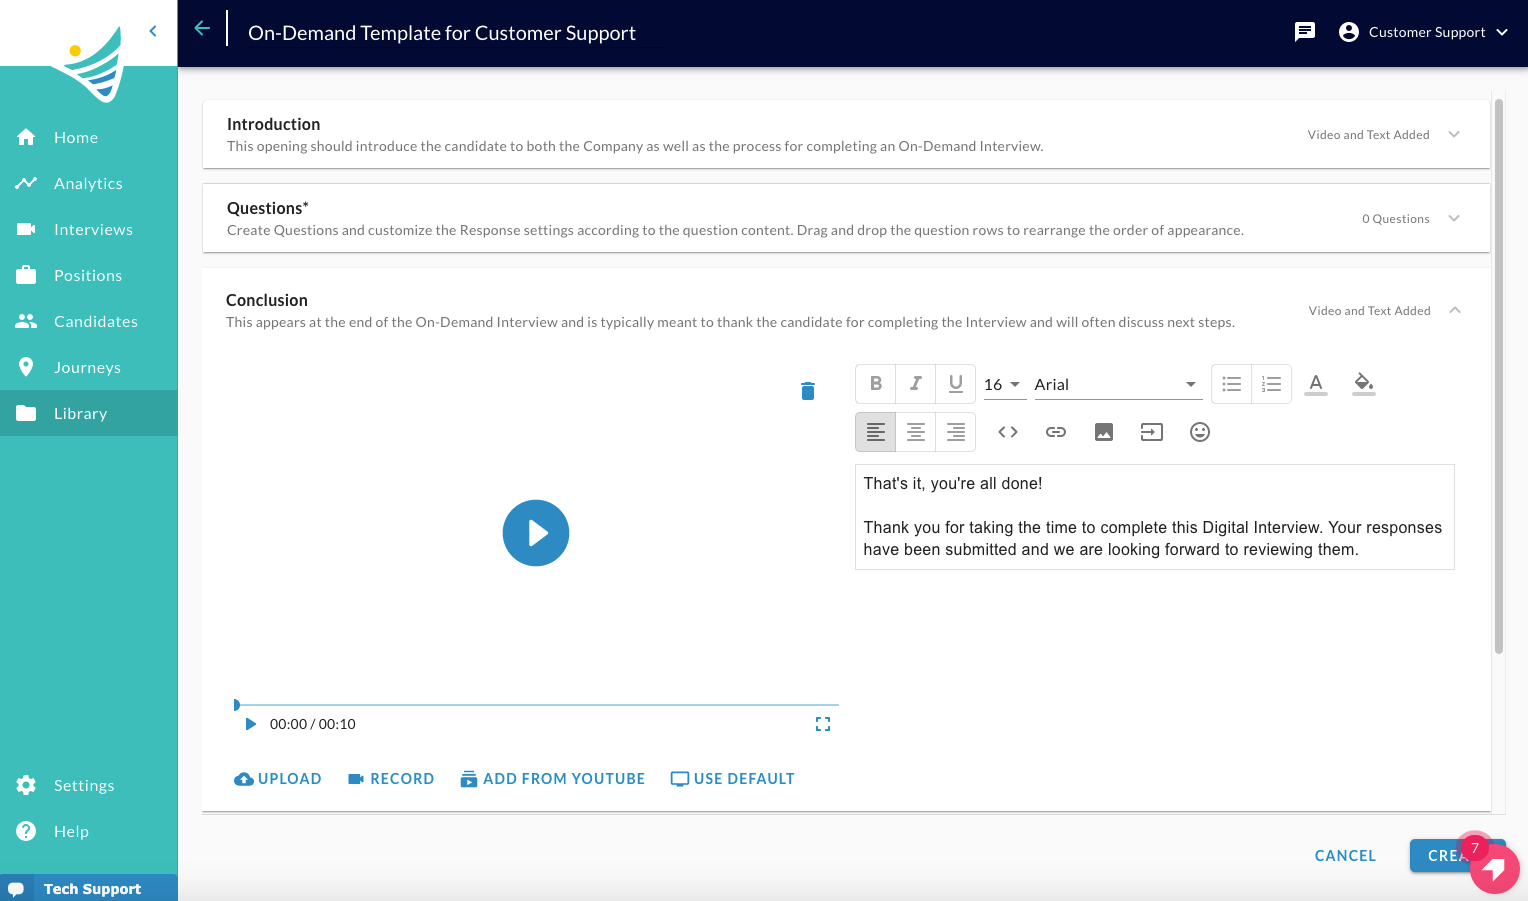
Click on "Conclusion" to see your options for creating a closing statement for the digital interview. As with the introduction, here you can upload a video closing message, record a video closing message directly from your computer, add a video from YouTube or type in concluding the text. We recommend using both a personalized video and concluding text.
Step 7:
Click on "Assessment Criteria" to begin adding criteria that you would like recruiters and hiring managers to score for the position. Here you can type in your criteria and click ADD. Criteria will use a 1-10 ranking system.

Step 8:
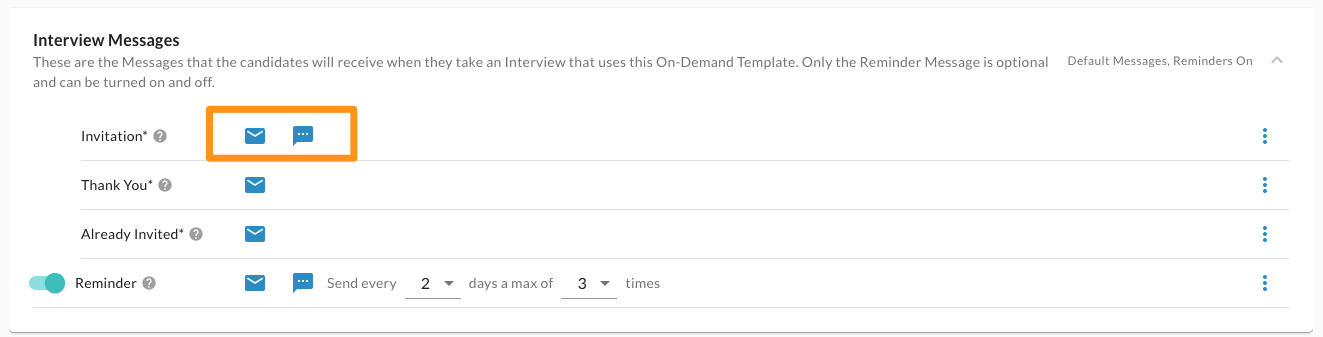
Click on "Interview Messages" to set up your email and SMS (optional) messaging that will be sent out when the On-Demand is sent to the candidate, as well as reminders for those messages.
- Invitation: This is the invitation sent to the candidate to take the On-Demand interview. It includes a link to the On-Demand interview.
- Thank you: This is the message that is sent to the candidate after completing the On-Demand interview.
- Already Taken: This is the message that is sent in cases where the interview template is used across positions. If the candidate has already taken the interview, they will get this message instead of the invitation.
Reminders: This is sent to remind candidates to complete the On-Demand interview if they have not. Set the number of reminders and the frequency.
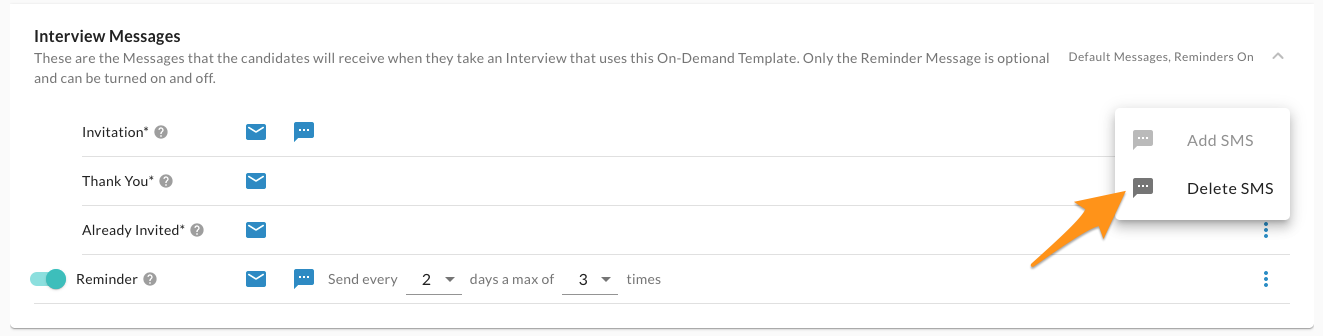
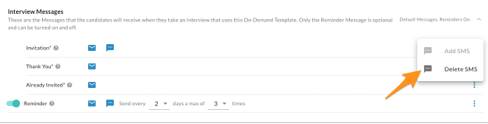
Click on the Email icon or SMS icon to edit the contents of each message. The SMS option can be deleted by clicking on the menu options all the way to the right, then click Delete SMS.
Step 9:
Within the Email message, you have the ability to edit your Email Subject. The ‘Reply-To’ Display Name and ‘Reply-To’ Email Address will be automatically populated based on your master settings. The merge fields list is expanded for these communications.
Our best practice recommendation is to use a group or team recruitment email address for the ‘Reply-To’.
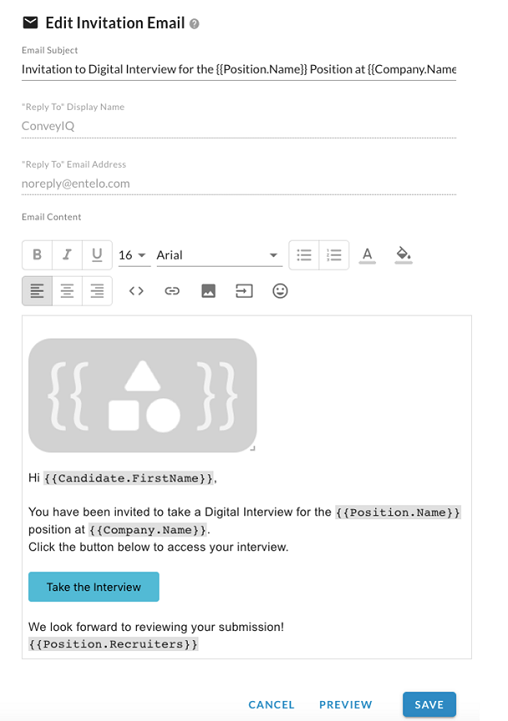
Here you have the option to add a button that will link to the On-Demand or to an external URL. 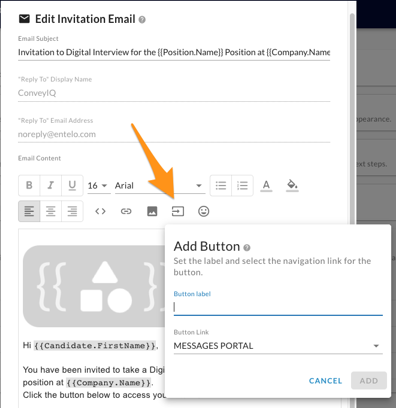
Step 10:
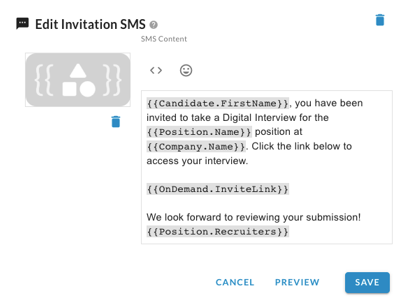
Within the SMS message, you have the ability to create a reminder that an email invitation to complete the digital interview was sent. The same list of merge fields will be available to customize the SMS.
Step 11:
The option for Reminders can be configured here. At the very left, the switch can turn the reminders option on or off. Reminders can then be configured with a maximum number of reminders as well as duration between reminders until the digital interview is complete.
After all configurations are completed, click "SAVE". You can then proceed to use the template in a Journey by clicking "USE IN JOURNEY".
