Scheduling Setup: Office 365 and Exchange Configuration Steps
Creating a Service Account
The following steps need to be completed to enable ConveyIQ Scheduling with Office 365 or Exchange:
- Create a new user account that will serve as a Service Account by going to Office 365Admin Center > USERS > Active Users.
- Make sure the account does not belong to a physical person.
- Click the 'Add New User' link.
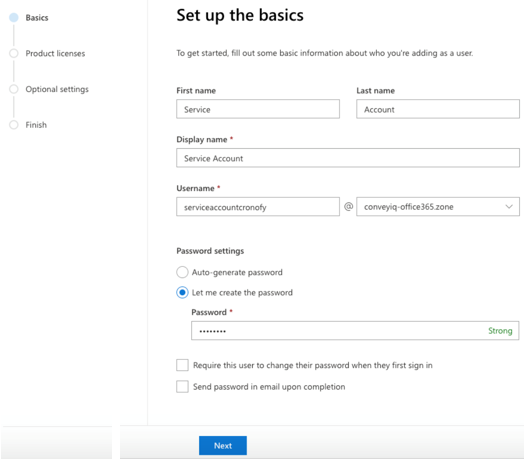
- Enter the first name, last name, display name, username, and email domain.
- Select 'Let me create the password' and enter the password for the service account.
- Deselect the 'Require this user to change their password when they first sign in' check box.
- Deselect the 'Send password in the email upon completion' check box.
- Click Next.
- On the 'Product Licenses' section select the location.
- Assign the user a product license by selecting the"Office 365 Business Essentials" option.
- Click Next.
- On the 'Optional Settings' section select the 'User (no admin center access)' option
- Click Next.
- On the 'Review' section click Finish Adding.
Creating a new Role and assign to the Service Account
- In the Office 365 Admin portal, go to Permissions.
- Under the 'Admin Roles' tab click the '+' icon to add a new role.
- Enter the required information:
- Role name: ApplicationImpersonation
- Write scope: Default
- Click on the '+' icon above Roles, and select ApplicationImpersonation from the list.
- Click Add.
- Click OK.
- Click on the '+' icon above Members. Select your service account from the list.
- Click Add.
- Click OK.
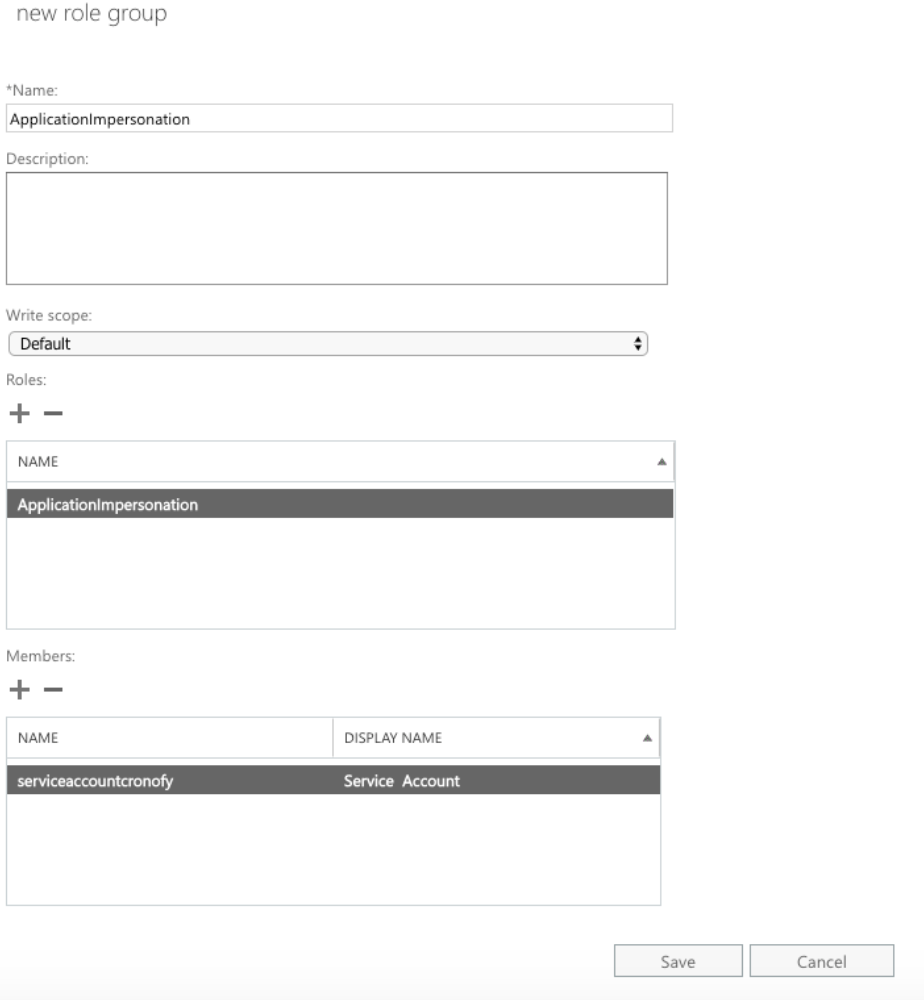
- Click Save.
Authorize Calendar Access
Note: For this step, you will need a user account for ConveyIQ with Company Admin permissions. If you do not have an account already, contact Support.
- Open a browser tab (preferably incognito) where you are not logged in to Office365 or Exchange.
- Sign in to ConveyIQ application https://identity-provider.na.conveyiq.com/session/landing
- Once signed in, click Settings from the left side menu.
- On the 'Company' tab, expand the 'Calendar Authorization' section.
- Click Authorize Calendar.
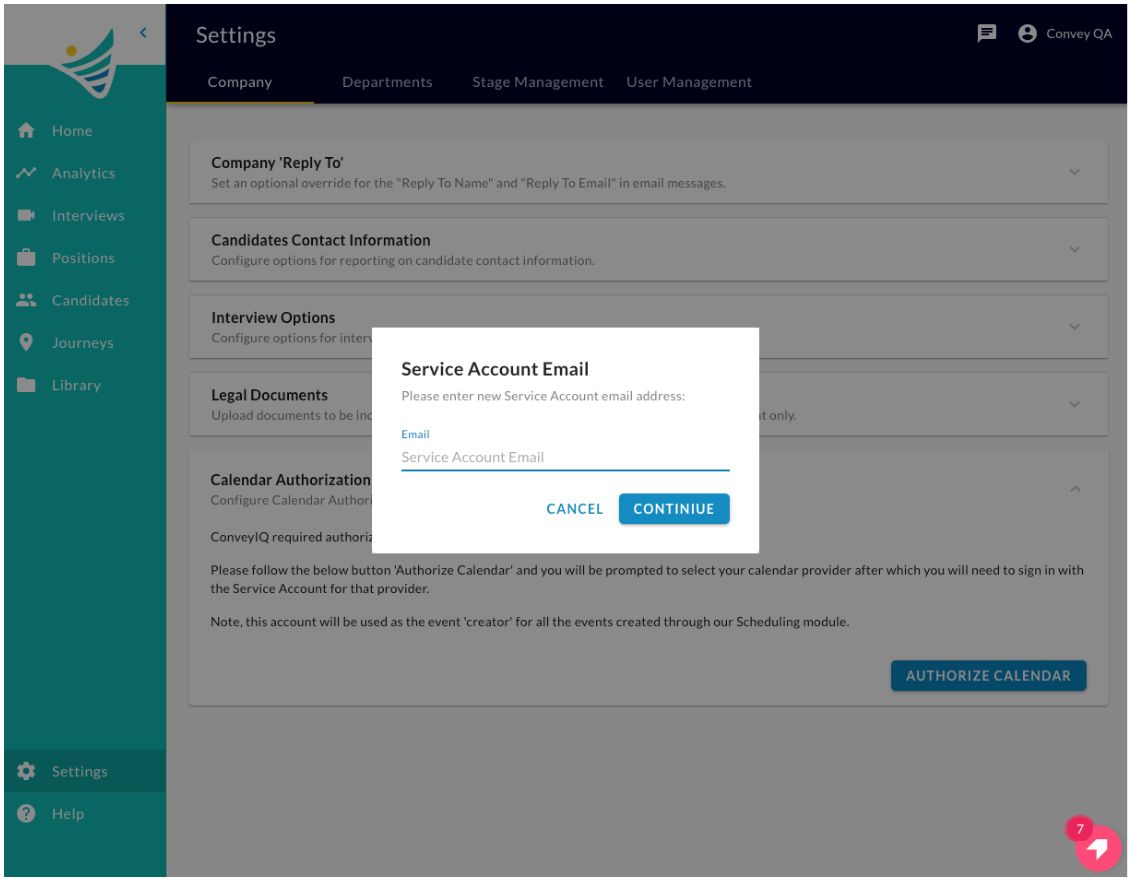
- In the Email field, enter the Service Account email address created in step 1.2.
- Click Continue.
- You should be redirected to the Cronofy Enterprise Connect application.
Office365
- Choose'Office365'.
- After selecting Office 365 you will see a screen similar to this:
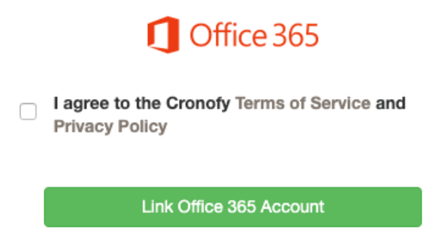
- Check the 'I agree to the Cronofy Terms of Service and Privacy Policy' checkbox.
- Click the 'Link Office 365 Account' button.
- You will be asked to sign in, make sure to sign in with the Service account entered in step 6.
- After successful sign in you will be redirected back to ConveyIQ application > Settings page.
- You are done! Just in case, refresh the page and check the Calendar Authorization section, it should look similar to this:

Exchange
- Choose the Exchange
- You will see a screen similar to this:
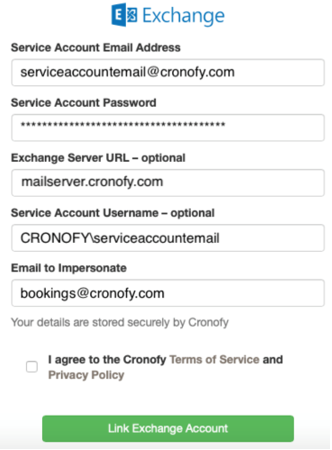
- As illustrated in the above example, populate all the fields with your service account and Exchange information.
- Check the 'I agree to the Cronofy Terms of Service and Privacy Policy' checkbox.
- Click the 'Link Exchange Account' button.
- You will be asked to sign in, make sure to sign in with the Service account entered in step 6.
- After successful sign in, you will be redirected back to ConveyIQ application > Settings page.
- You are done! Just in case, refresh the page and check the Calendar Authorization section, it should look similar to this:

At this point, all should be configured and the following is expected to work:
- On the Settings > User Management page all users listed under the 'Active' table, that have the email address under the same domain as the service account, should have Calendar status: Connected.
- You can start creating Scheduling Templates and setting the users, that have connected calendars, as Interviewers.
- You can start inviting candidates to schedule an interview.