How to conduct On-Demand Interview
Are you ready for your interview? No worries, we are here to help!
In case you feel nervous about your interview, you can check this article that can help you leave a good impression.
Now for the technical side, we have some tips that can help your interview run smoothly.
1. Use Chrome Browser for Windows & Safari for Mac
Our platform is optimized for the Chrome Browser if you use Windows, which is why, before you start your interview, please download the Chrome browser. Here is the link where you can do that: https://www.google.com/chrome/
If you are a Mac user, you can proceed with Safari.
2. Link invitation email
To take the interview, you will receive an email invitation for the interview. It will look similar to this email:
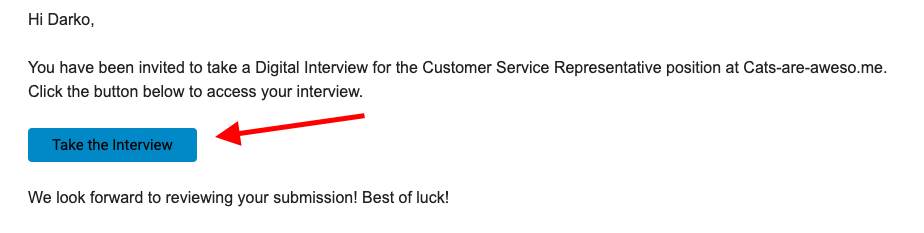
Please note that the text in your email invitation may not look like this as your recruiters may have adjusted the interview invitation email to their company.
3. Get started!
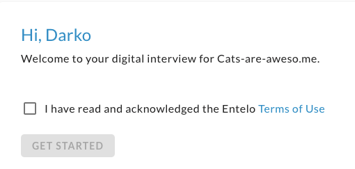
Are you ready to get started? If so, click "Get Started". At first, the button will be grayed out, however, after you have agreed to Entelo’s Term of Use and checked the box, you will be able to click get started. Below you can find the screenshots.
Before checking Entelo’s Term of Use Box:
After checking Entelo's Term of Use Box:
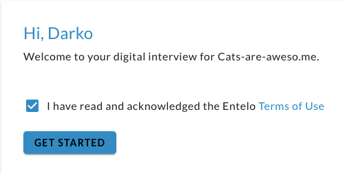
Note that there may be the Terms of Use set by your recruiter.
Now that you are ready, we can begin!
4. Allow Audio & Video
Once you click on "Get Started" you will be asked to Allow audio and video. As the interview is being recorded, it is required to allow audio and video in order to conduct the interview. The message will look like this:
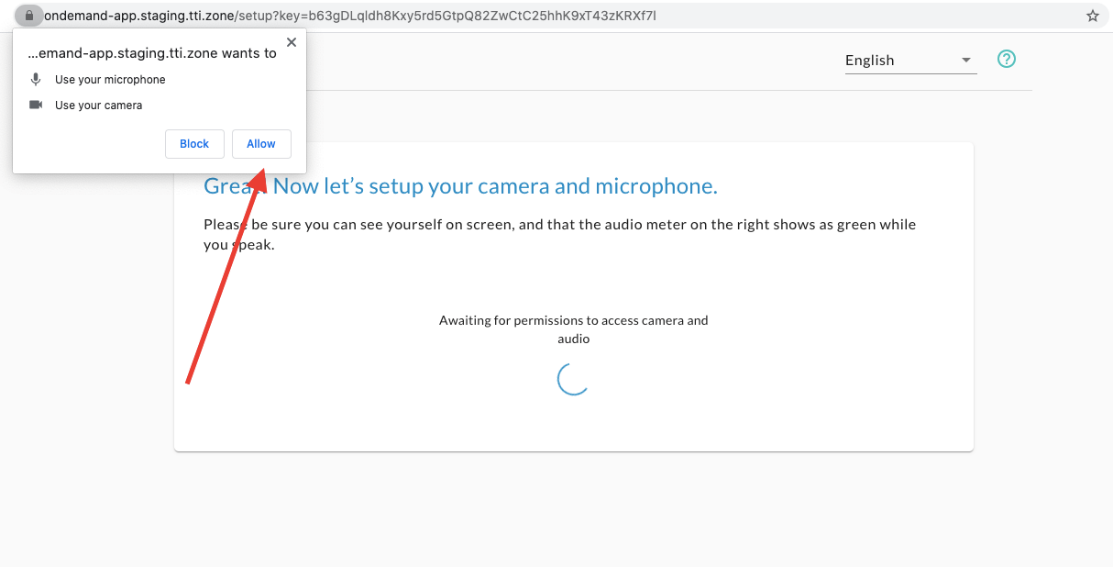
In case you click you don’t allow Audio and Video, please refresh your page so you can get the pop-out window to allow audio and video again.
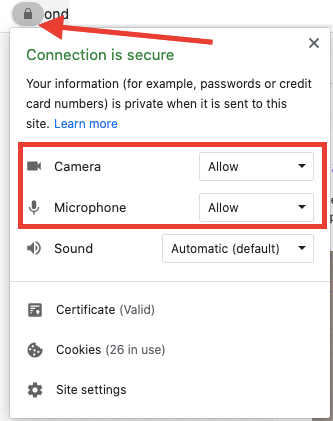
You can also manually allow audio and video by clicking on the lock on the left side of the URL bar and selecting allow for microphone and camera. Here is the screenshot:
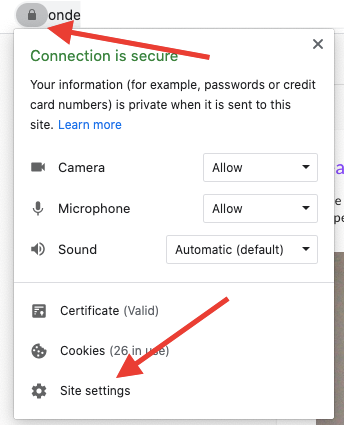
If there is no field to allow audio and video then click on "Site Settings". Here is the screenshot:
Once you click on "Site Settings" you will see the "Microphone" and "Camera" option. Here is the screenshot:
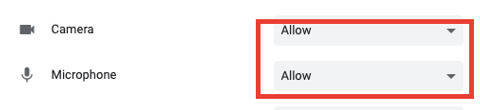
You can now manually allow audio and video.
Please note that you should conduct an interview in a language that is spoken by the company you are applying for unless agreed otherwise with your recruiter.
5. Checking Audio & Video
You can check if your audio and video work properly after allowing it by checking if you appear on the screen. If you do, your camera is working properly!
As for the sound, you can check it by looking at the bar on the right side of the video. If it is moving when you speak, your microphone is working properly!
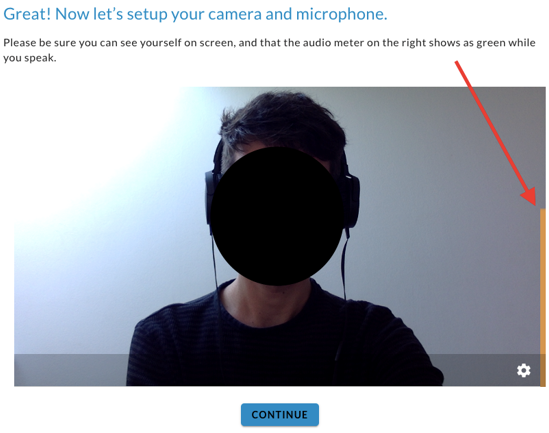
In case you would like to use external camera or microphone, you can do so by clicking on the "Settings" option in the lower right corner:
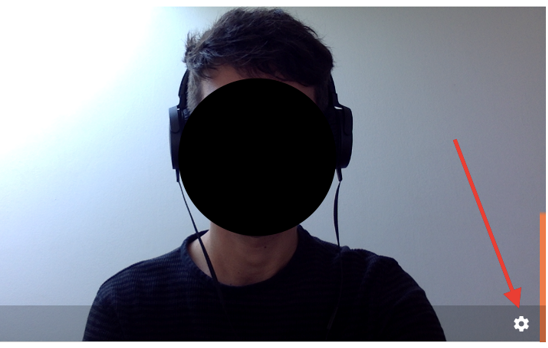
Once you click on it, there will be a pop-up window where you can choose different camera or microphone device:
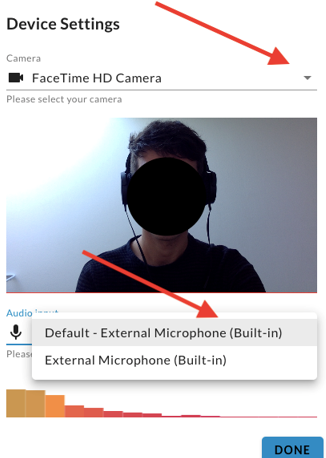
6. Practice Questions
If you are feeling nervous about an interview, we got you covered! You can do Practice Questions and see what the process looks like. There are two types of questions you can have, Video Response and Text Response. Video Response question means that you will be able to respond to a question with a video, while Text Response means that you will be able to respond to a question by typing in the answer:
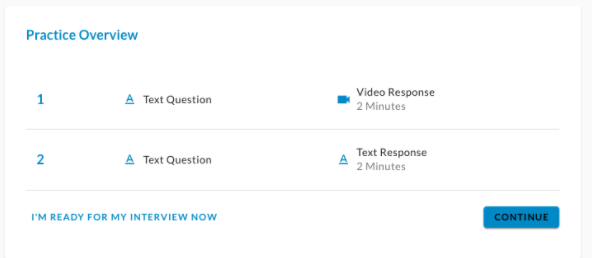
Once you are ready for the actual interview, please click "I’m ready for my interview now".
7. Upload your Resume
If your recruiter wants to get to know you better, may ask you to attach your resume.
This step can be optional or required, that depends on the setup defined by your recruiter.
If the resume upload is set as optional - you can skip it if you don't want to enclose your resume.
However, if it is set as required - you'll not be able to proceed with the interview process before you upload the file. In this case "skip this step" will not be an option.
If you choose to upload a resume or this action is required by your recruiter, there are two different ways how to do that:
- Drag and drop files or
- Browse to upload.
You can choose from files on the device, mobile, and desktop, or from a cloud account.
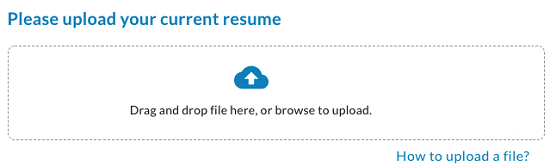
Once you have selected your resume it will look like in the next picture.
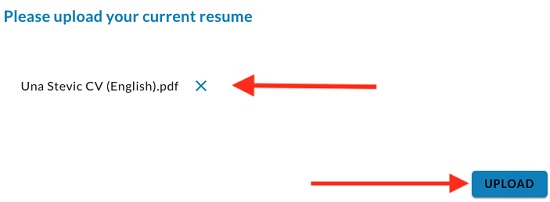
After uploading your resume you will proceed to the interview starting with your interview questions.
Please note following:
- The support file formats are: .doc, .docx, .pdf, .png, .jpg
- Maximum file size: 50 MB.
If you are interested in a detailed step-by-step explanation, check out our article: How to upload your Resume?
8. Interview Overview
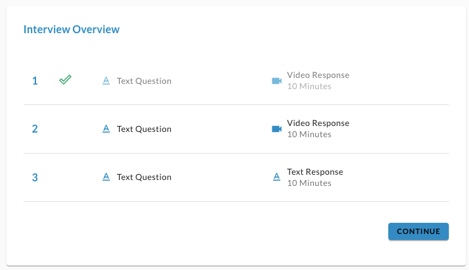
In the interview overview, you will see the type of question (text question or video question). The text question will be in written form, while the video question would mean that your recruiter or a respected member of the HR team made a video asking a question and uploaded it for the interview..
You will also get to see what kind of response is required from you (text response or video response).
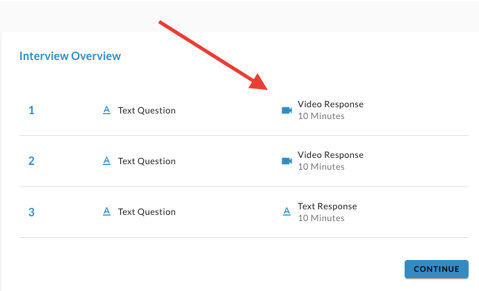
Once you are ready to start the interview, click "Continue".
9. Preparation Time
For each question, you will have preparation time. The time is set by your recruiter. It can give you time to see the question and prepare for it. Here is how it looks like:
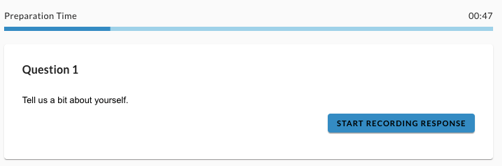
10. Video Response
When answering a video question, you are being recorded, so make sure to look your best! You will be able to see the countdown before the recording starts, all of the buttons on your screen will be grayed out. Here is how it looks like:
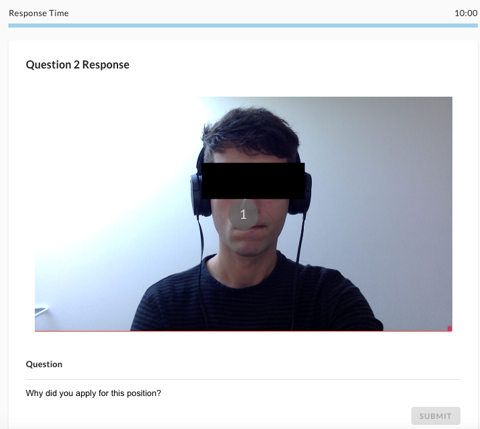
Once the countdown ends, you can start with your interview! Here is how it looks like:
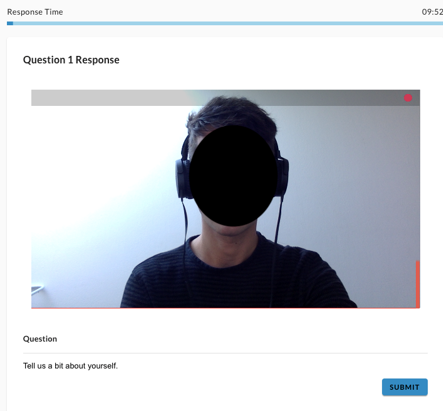
Please note that you have certain amount of time to answer each question. The time is set by your recruiter or respected HR team of the company you have applied for. When you are done answering the question, you can proceed to the next question, but clicking "Submit".
11. Retry
If you are not satisfied with your answer, you can click on "Retry" and answer the question again. You can find "Retry" button in the lower right corner, next to the "Submit" button. Here is how it looks like:
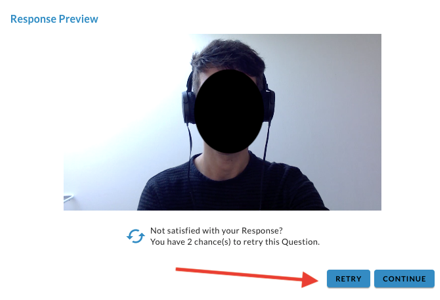
Please note that you will be able to see "Retry" option if it was added by your recruiter.
12. Text response
In addition to the video answer, you can also enter your answer to a certain question. It looks like this:
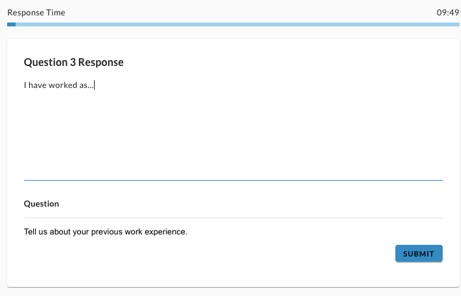
Please note that both video responses or text responses are set by your recruiter. You may not have text response, but only video response and vice-versa.
13. Interview Overview
At the end of the interview, you will get to see "Interview Overview" where you can make sure everything is answered. Here is how it looks like:
14. The End
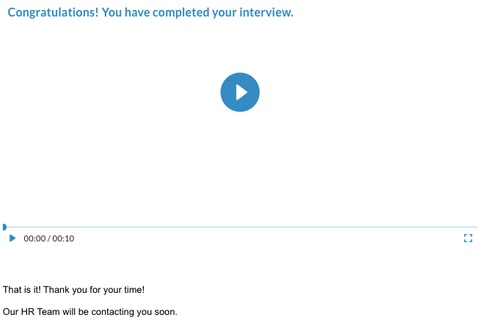
And that is it! This is how the On-Demand interview goes. If you are not satisifed with your interview, there will be "Retry" button in the end so you can take it again, if it was set by your recruiter.
P.S. Best of luck in your interview!