How to Create a Department Journey
Step 1: There are two options to create a journey in ConveyIQ:
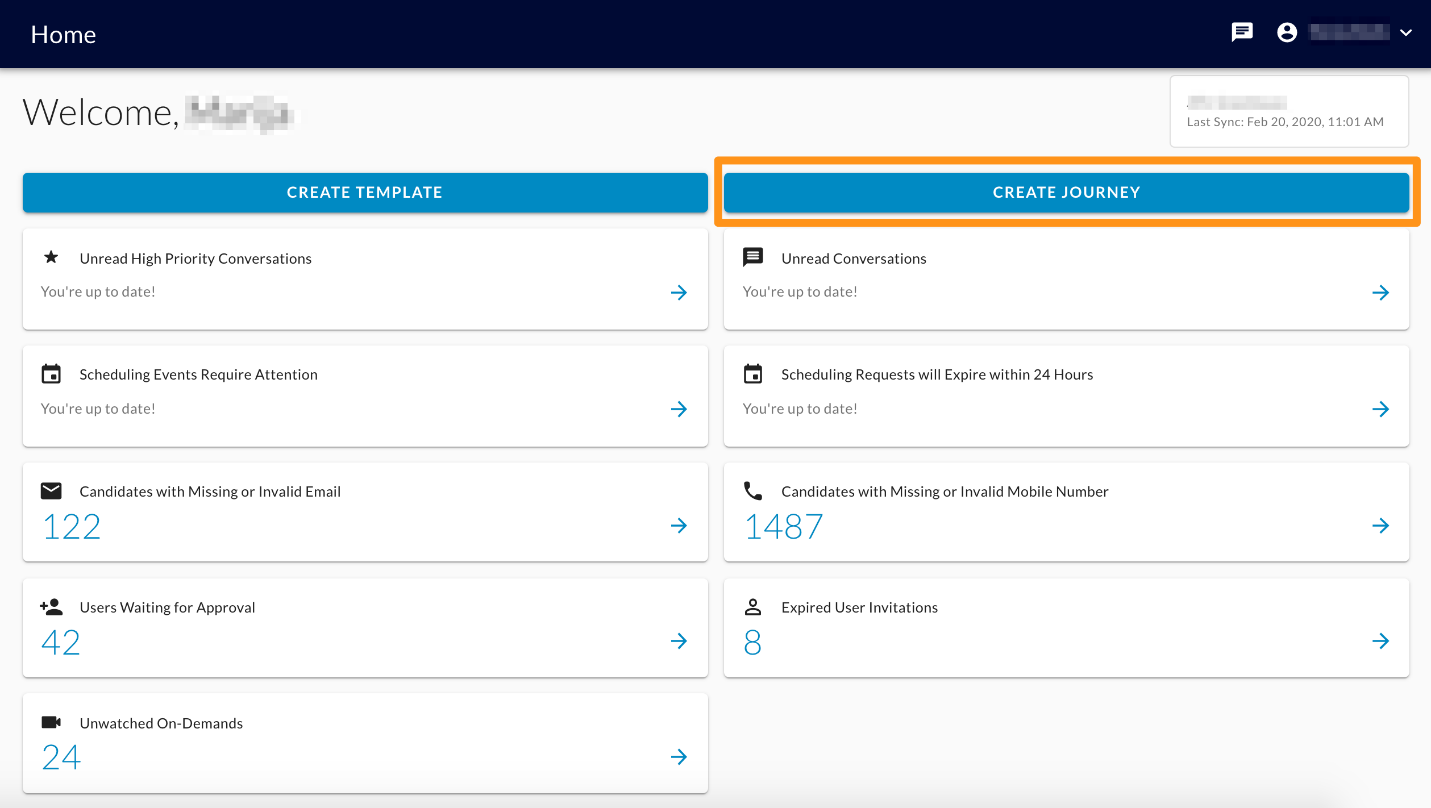
- Option 1: On the Home page, click the "CREATE JOURNEY" button
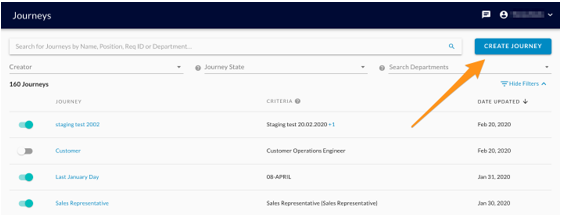
- Option 2: Navigate to the Journeys page from the menu panel. Then click "CREATE JOURNEY"
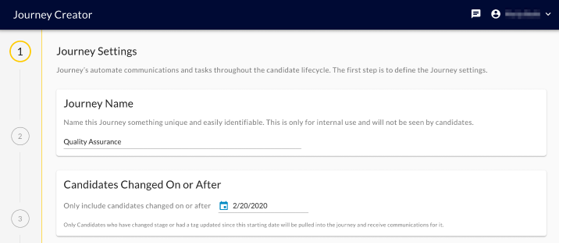
You will then be presented with the "Journey Creator". There are four components to this step:
- Setting up Journey Settings
- Setting up Journey Triggers
- Setting up Stage Messaging
- Reviewing & Confirming Journey
Step 2: You will be able to define the journey name (which is required to be unique) and to set the date in which only candidates who have changed stage or had a tag updated will be pulled into the journey and receive communications for it.
Step 3: Click on "Departments" to begin the process. Creating a Journey at the Department level will ensure that all associated positions within that department (regardless of job title or any other criteria) will carry the same communications, steps, and settings. 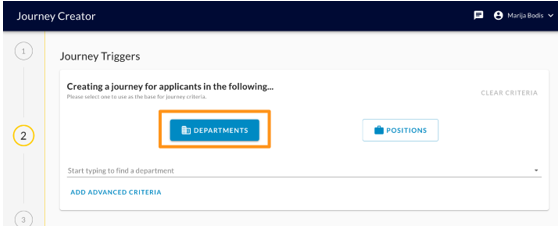
Step 4: You will need to choose which department this Journey will be associated with. Start by using the drop-down option to search for previously created departments. You may create a journey that is tied to multiple departments. Once you’ve selected a department(s), click "Next".
Note: You may also create a Journey and save it as a draft.
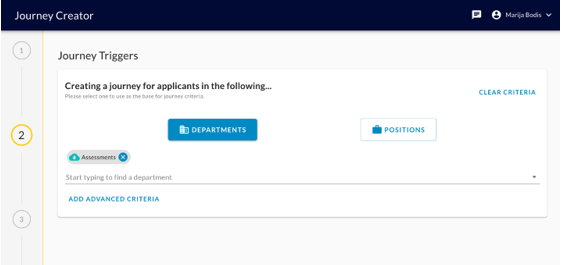
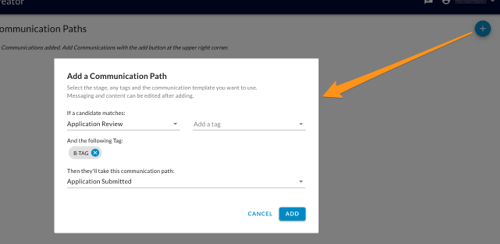
Step 5: Stage Messaging: This will allow a user to select a stage to apply custom messaging. Users can choose one or multiple stages and create individual messaging for each stage that a communication (email / SMS) should be sent out for.
We have a set of pre-made templates to choose from for the most common stages in the hiring process. The user can choose the content or make modifications to suit their needs.
For users that wish to use an On-Demand interview for their hiring process will choose to "Send On Demand" and the appropriate On-Demand template.
Once you’re satisfied with your selections, click "ADD".
The ‘Email Subject’ must be filled out here. The ‘Reply-To’ and ‘Reply-To Email’ will be pre-populated based on the configuration in the Settings section of the application. Font, font size, color, fill and alignment are all customizable. Links, merge fields, images, and buttons can also be added to your messaging. Click ‘SAVE’ to move to the next step.
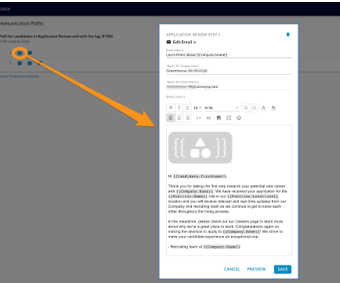
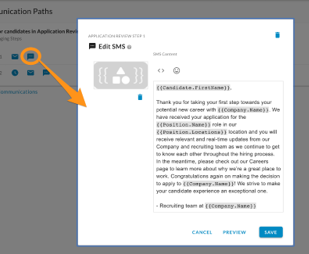
Email and SMS content can still be edited after the stage messaging steps have been added in.
- Click on the down arrow to the far right of the stage name that you wish to edit
- Click on the respective icons (envelope for email, chat for SMS)
- A pop-up will appear for you to review or edit the messaging
- Click ‘PREVIEW’ to send yourself or another person a preview of the content via email / SMS
- Click ‘NEXT’ to move into the final stage of creating a Journey
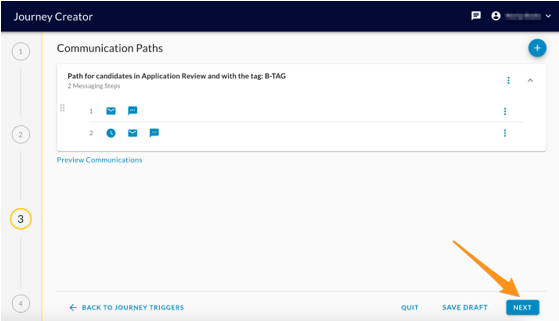
Step 6:
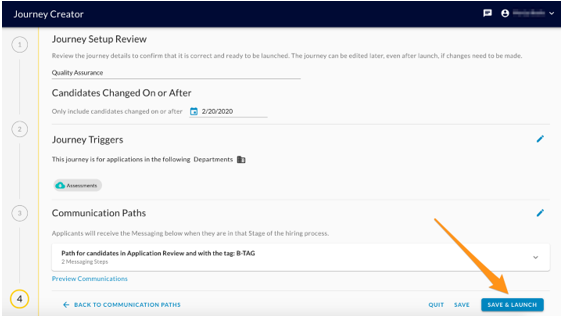
Journey Review: This is the final of three steps in creating a Journey. Here you will title your Journey and review the stages/communications. Pencil icons for each section will allow you to edit the journey. The pencil icons navigate you to the appropriate step in the journey build to make modifications.
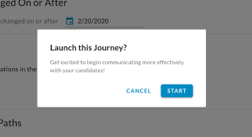
After all reviews have been completed and you are satisfied with the Trigger Criteria and Stage Messaging steps, create a title for your Journey and click ‘SAVE & LAUNCH’. By doing so, you will be prompted with confirmation that you are ready to launch this Journey. Click ‘START’.
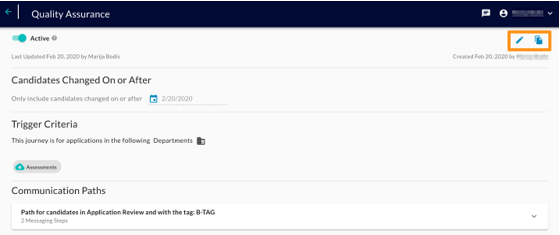
Edit a Journey / Make a Copy of a Journey: A journey can still be edited after launch. Click on the pencil icon to make edits, or the paper icon to make a copy of the journey.