Scheduling Setup: G-Suite Configuration Steps
Installing the Cronofy application in G-Suite
The following steps need to be completed to enable ConveyIQ Scheduling with G-Suite.
- To configure access to calendars hosted by Google an administrator of your Google Apps domain will need to first install the Cronofy G-Suite Application.
Note: If a non-administrator user attempts to install the app this will be rejected.
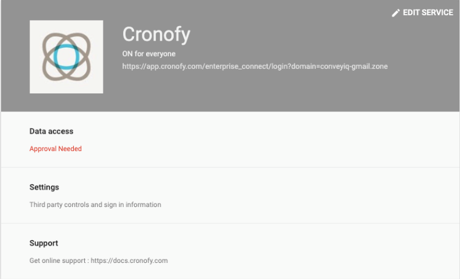
- When the Cronofy App is installed under Apps > Marketplace Apps click the app to see settings
- Click Edit Service.
- Under the Service Status section make sure it is set to ON for everyone.
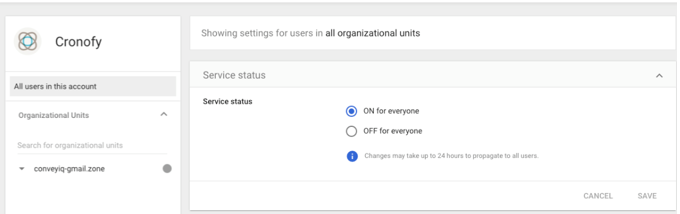
- Make sure the settings apply to users in All Organizational Units.
- Click Save (if any changes made).
Creating a Service Account and set permissions
- Go to https://admin.google.com/ac/users and click ‘Add new user’.
- Create a new user account that will serve as a Service Account under the root Organizational Unit. Make sure the account does not belong to a physical person.
- Once the user is created, click the user to access details.
- Expand the ‘Admin roles and privileges' section.
- Click Create a custom role.
- Click Create new role.
- Give the desired name e.g.: Cronofy Admin
- Click Create.
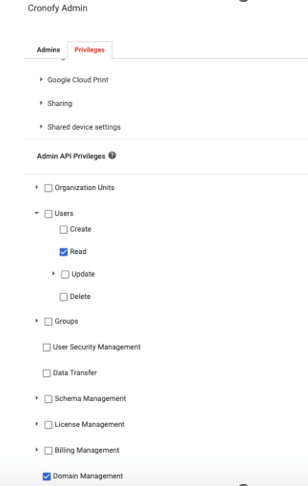
- Select the following privileges:
- Under ‘API Admin Privileges’ expand Users and check the ‘Read’ checkbox.
- Under ‘API Admin Privileges’ check the ‘Domain Management’ checkbox.
For a more restricted service account setup, please check these instructions: Restricting Service Account Access
Authorizing Calendar Access
Note: For this step, you will need a user account for ConveyIQ with Company Admin permissions. If you do not have an account already, contact Support.
- Open a browser tab (preferably incognito) where you are not logged in to G-Suite.
- Sign in to ConveyIQ applicationhttps://identity-provider.na.conveyiq.com/session/landing
- Once signed in, click Settings from the left side menu.
- On the 'Company' tab, expand the 'Calendar Authorization' section.
- Click the Authorize Calendar.
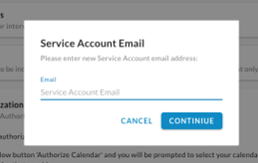
- In the Email field, enter the Service Account email address created in step 1.2
- Click Continue.
- You should be redirected to the Cronofy Enterprise Connect application.
- Choose the 'Google' option.
- After selecting Google you will see a screen similar to this:
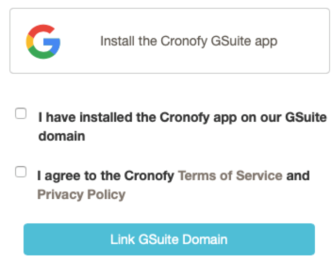
- Check the 'I have installed the Cronofy app on our GSuite domain' checkbox.
- Check the 'I agree to the Cronofy Terms of Service and Privacy Policy' checkbox.
- Click the Link GSuiteDomain.
- You will be asked to sign in, make sure to sign in with the Service account entered in step 6.
- After successful sign in you will be redirected back to ConveyIQ application > Settings page.
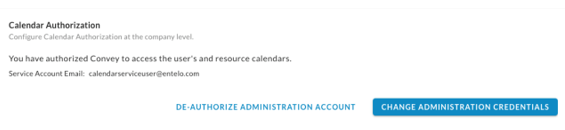
- You are done! Just in case, refresh the page and check the Calendar Authorization section, it should look similar to this: