User Management Settings
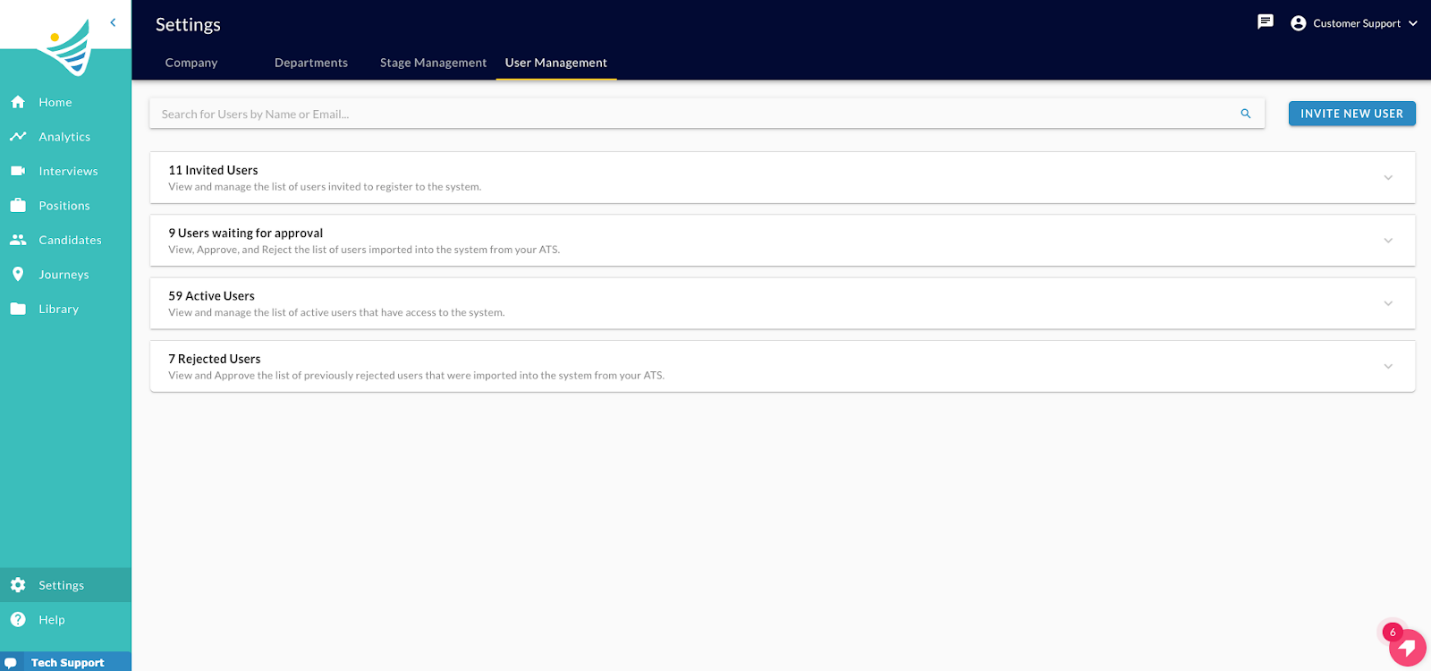
You will start in the User Management tab within the Settings control panel. You will see the "Invited Users", "Users waiting for approval", "Active Users" and "Rejected Users". Each section contains the user's name, email address and the date the invitation was sent (if they are inactive) or their last login date (if they are active)
You can perform the following actions:
- Invite New Users
- Manage Existing Users
- Search for Users by Name or Email
- Edit & View User Permissions
- Delete a User
Invite a New User
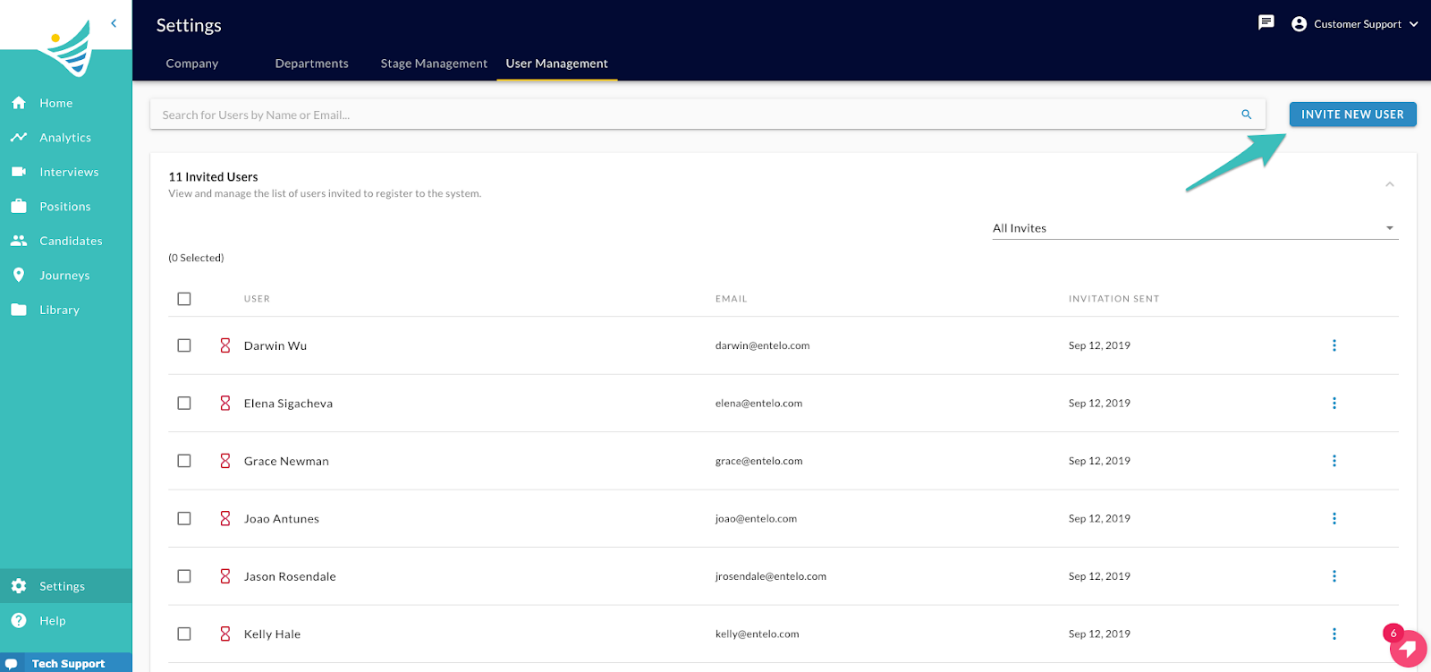
To invite a new user, click on the "INVITE NEW USER" button.
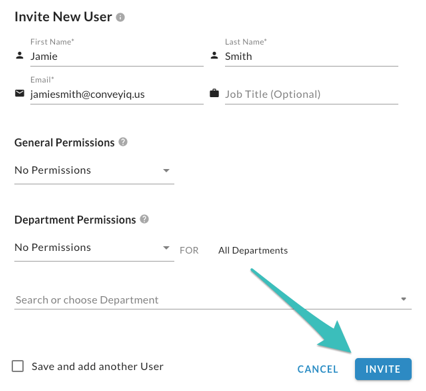
- You will then be prompted to fill out general user information including first name, last name, email and job title (optional).
- To ensure what functionality this user will have while using ConveyIQ, you will have to assign user permissions.You can set them up on the company level and department level.
- General Permissionsinclude: Library Admin, Company Admin, No Permissions
- Department Permissionsinclude: Read Only, Reviewer, Creator and Reviewer, No Permissions.Department level permissions can be set with access to All Departments, or search/choose specific departments within the dropdown list below.
- Once you finish, click the blue "INVITE" button to send the invite and save user settings and permissions.
Editing User Permissions
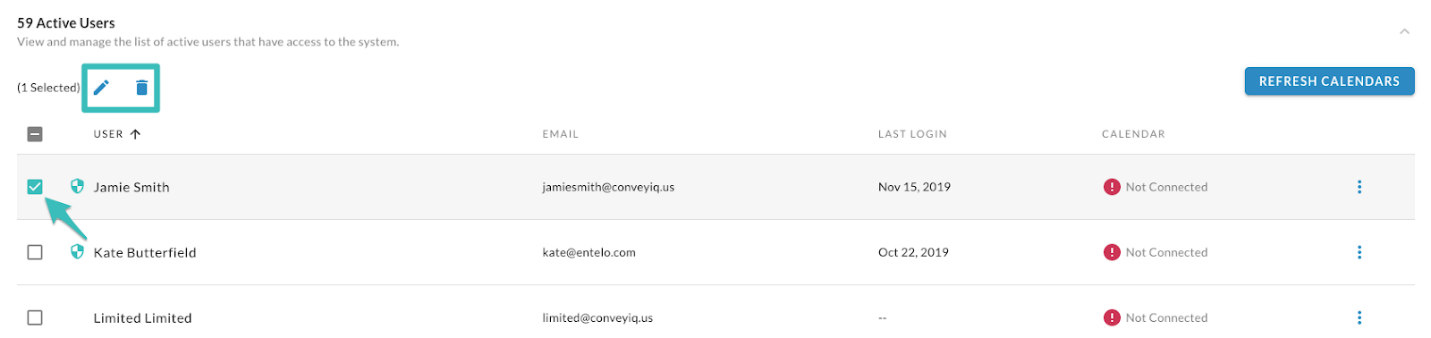
Click on the checkbox to the left of the user's name. Then click on the blue pencil icon that appears in the panel above.
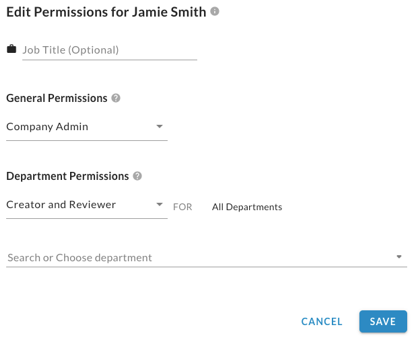
Here you will have the ability to update the user:
- Job Title
- General Permissions
- Department Permission
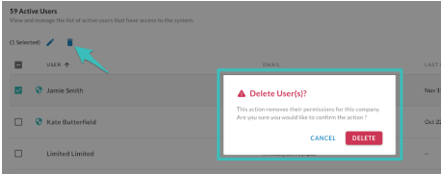
Delete a User
You can edit permissions, check the last login date and if needed delete a user at any time. To delete a user, click on the checkbox to the left of the user’s name and click on the blue trash can icon that appears in the panel above. A confirmation message will pop up and, if you are sure you want to delete the user, click on "DELETE"